Replacing an underused bathtub with a shower can make a bathroom feel easier to use, more open, and better suited to everyday routines. A well-planned bath tub conversion considers much more than the new wall color or showerhead. Entry height, drainage, storage, maintenance, and the needs of everyone in the household should shape the final design.
The best results begin with practical questions. Who uses this bathroom most often? Is quick access more valuable than having a soaking tub? Will the space need to support changing mobility needs in the future? Answering these questions before demolition helps homeowners choose features that improve comfort for years, rather than simply updating the room’s appearance.
Why Homeowners Convert Tubs to Showers
Many households use a shower every day but rarely take baths. In that situation, removing a high-sided tub can create a more useful bathing area without increasing the bathroom’s footprint. A shower may also make a compact room feel less crowded, particularly when clear glass or a simple open layout allows more light to move through the space.
Easy entry is another major consideration. Stepping over a tub wall can become less comfortable after an injury, during pregnancy, or as mobility changes with age. That does not mean every home should remove every bathtub. Keeping a tub in another full bathroom can remain practical for households with young children, frequent overnight guests, or those considering future resale.
Start With Safety and Access
Bathroom safety is a system, not a single accessory. A safer shower may include a low entry, secure footing, bright lighting, reachable controls, seating, and properly installed support bars. Standard shower bases have a raised edge, low-threshold bases reduce that step, and curbless showers aim for a nearly flush transition from the bathroom floor into the shower.
Place the main controls where they can be reached before standing directly under the spray whenever the layout permits. A handheld showerhead on an adjustable slide bar can also make rinsing, cleaning, and seated bathing easier.
Before walls are closed, ask about adding blocking or reinforcement where grab bars may be installed now or later. Decorative towel bars are not substitutes for grab bars designed and mounted to support body weight.
Measure the Bathroom Before Choosing a Design
A new shower often fits inside the former tub area, but the surrounding clearances matter just as much. Measure the full opening from wall to wall, note the drain and supply-line locations, and check how the bathroom door swings. Also, identify windows, vents, outlets, ceiling height, and the wall space available for a glass panel or shower door.
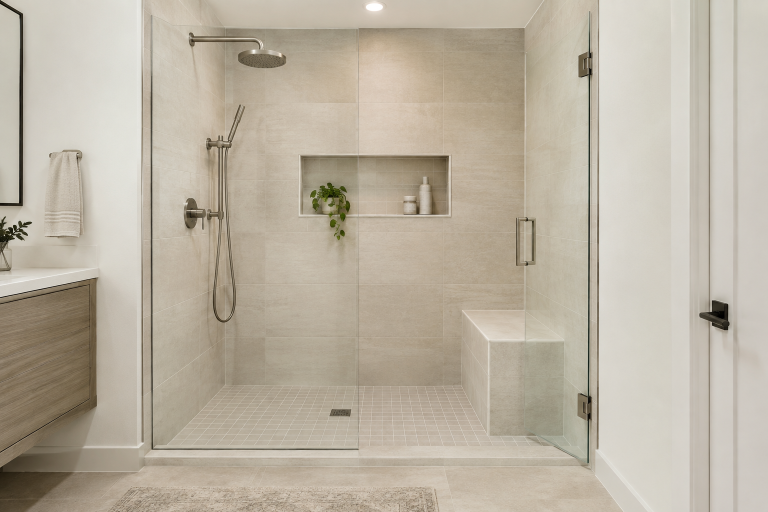
In a narrow bathroom, a sliding enclosure can avoid the clearance needed for a pivoting door. A recessed niche can replace a shelf that projects into the shower, while wall-mounted accessories can keep the floor area clearer. These smaller choices can make the room feel more functional without relocating the toilet or vanity.
Choose Features That Support Daily Comfort
Choose shower features based on how the household actually bathes. A built-in bench offers a permanent resting place and storage surface, while a folding seat can preserve standing room when it is not needed. Portable shower chairs are flexible, but they take up floor space and should be selected carefully for stability.
- Storage: Recessed niches, corner shelves, and baskets should be easy to reach without excessive stretching or bending.
- Handheld sprays: Flexible hoses and adjustable mounting heights help accommodate users of different heights.
- Grab bars: Plan their locations around real movements, including entering, turning, and standing from a seat.
- Doors: Sliding doors save swing space, while pivot doors can provide a wider opening when room allows.
- Lighting: Even, damp-rated lighting helps reduce shadows around the entry, controls, and shower floor.
Compare Materials and Maintenance Needs
There is no single best shower material for every home. Tile provides broad design flexibility, but grout lines need ongoing care, and the waterproofing behind the finish must be installed correctly. Acrylic or composite wall panels have fewer seams and may simplify routine cleaning. Stone can create a distinctive appearance, though some products require sealing and more specialized care.
Glass panels can make a room feel brighter, but they may show mineral deposits or water spots. For the floor, prioritize a slip-resistant surface that still feels comfortable under bare feet. Before selecting finishes, ask how they handle soap residue, stains, repairs, replacement parts, and long-term exposure to moisture.
Review Plumbing, Drainage, and Waterproofing
The visible shower is only part of the project. Once the tub is removed, the installer can inspect the framing, plumbing, and subfloor for signs of prior leaks or damage. The new drain may not align exactly with the old tub drain, and the shower floor needs a proper slope so that water flows toward the drain rather than collecting at the edges.
Waterproofing also deserves close attention around corners, seams, niches, valves, and the shower base. Good ventilation helps manage moisture after bathing, and controlling water and moisture during bathroom remodeling extends beyond the shower surface to nearby materials and spaces below. Confirm local permit and inspection requirements before construction starts.
Build a Realistic Project Budget
Project costs vary because the scope can vary substantially. A straightforward replacement using existing plumbing is different from a project that requires drain relocation, subfloor repair, custom tile, new electrical work, or extensive wall reconstruction. Separate demolition, disposal, plumbing, waterproofing, finishes, doors, fixtures, permits, and cleanup when reviewing estimates.
Set aside a contingency amount for hidden damage found after removal. Request a written scope that identifies materials, labor, warranty terms, payment stages, and the process for approving changes. The lowest quote is not always the strongest value if it leaves waterproofing, drainage, or cleanup unclear.
Know What to Expect During Installation
- Measure the room and finalize the design, materials, and fixture locations.
- Remove the tub, surround, and any damaged materials.
- Inspect framing, subflooring, plumbing, and electrical conditions.
- Complete rough-in work for drains, valves, blocking, and ventilation as needed.
- Install the shower base and waterproof the walls, seams, and penetrations.
- Finish wall surfaces, fixtures, doors, trim, shelves, and accessories.
- Test drainage, water flow, seals, and door operation before final cleanup.
Avoid Common Planning Mistakes
- Choosing a shower design before measuring door swings and fixture clearances.
- Forgetting storage for daily bathing products.
- Selecting a smooth floor may be difficult to grip when wet.
- Skipping reinforcement for future grab bars.
- Assuming the existing drain will work without inspection.
- Leaving ventilation improvements out of a damp bathroom.
- Accepting a vague quote that does not explain hidden damage costs.
Final Planning Tips
A successful tub-to-shower conversion should work for the bathroom’s daily routine while allowing for future needs. When access, drainage, storage, maintenance, materials, and budget are considered before demolition begins, the finished shower is more likely to be comfortable, practical, and durable.